In this post, we’ll walk you through how to use the QPoint Zapier app to automatically receive survey results straight to your Gmail inbox. It’s a great way to stay on top of new responses without having to constantly check your dashboard.
What You’ll Need:
- A QPoint Survey account with at least one active survey
- A Zapier account
- A Gmail account
Step-by-Step: Connecting QPoint to Gmail with Zapier
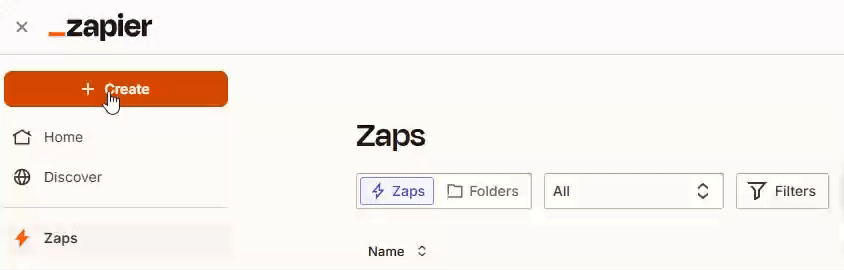
1. Log in to Zapier and Create a New Zap
Once you’re logged into your Zapier account, click “Create Zap”.
2. Set up the Trigger (QPoint Survey)
In the Trigger step:
- Search for QPoint Survey and select it.

- Choose the trigger event: New Survey Result
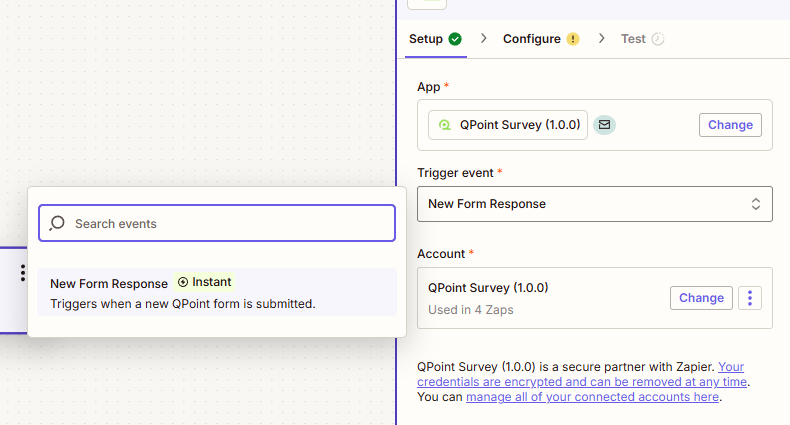
- Connect your QPoint account
You’ll be prompted to enter your API key or authenticate.
You can find your API Key in app. Open the top right menu, select Account and copy your API Key.
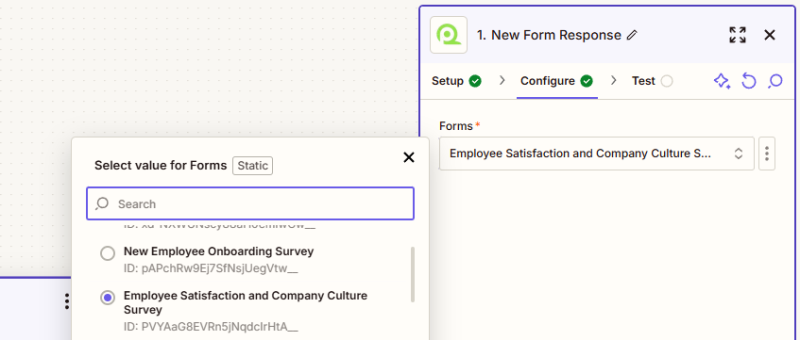
- Once connected, select the form you want to track.
- Test the trigger to make sure it can pull in a recent response.
Zapier will grab a sample response from that survey so you can use it to set up the rest of the Zap.
3. Add an Action (Gmail)
Now, for the Action step:
- Search for Gmail and select it.
- Choose the action event: Send Email
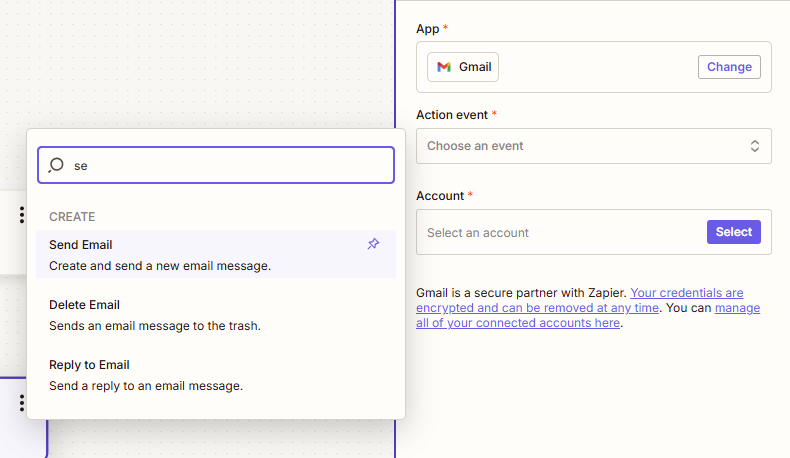
- Connect your Gmail account.
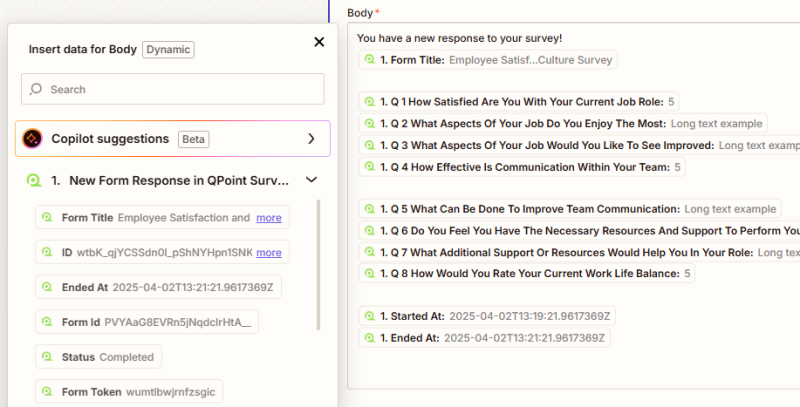
- Customize the email by using the fields from the survey to populate the email content
4. Test and Turn On Your Zap
Hit Test to make sure the email comes through as expected. If everything looks good, go ahead and turn on your Zap.
Done! From now on, every new response to that survey will trigger an email to your inbox.